
Design Storyboards
Define Step-by-Step Elements for Bringing Meetings to Productive Endpoints (~40–75 min.)
“The behavior of people is not driven by unchanging rules. The “rules,” if that is what they are, change as people learn.”
Purposes
In Design Storyboards, a group reinvents its meetings by selecting a set of Liberating Structures to achieve a clear, shared purpose. This approach helps the group define a precise meeting purpose, identify essential participants, and map out key elements. By organizing meetings around LS, we can eliminate causes of dysfunction, such as a lack of shared purpose and overcontrolled participation. This structure enacts LS Principle #1, Include and Unleash Everyone.
Principle: Include and Unleash Everyone.
Five Structural Elements—Min Specs
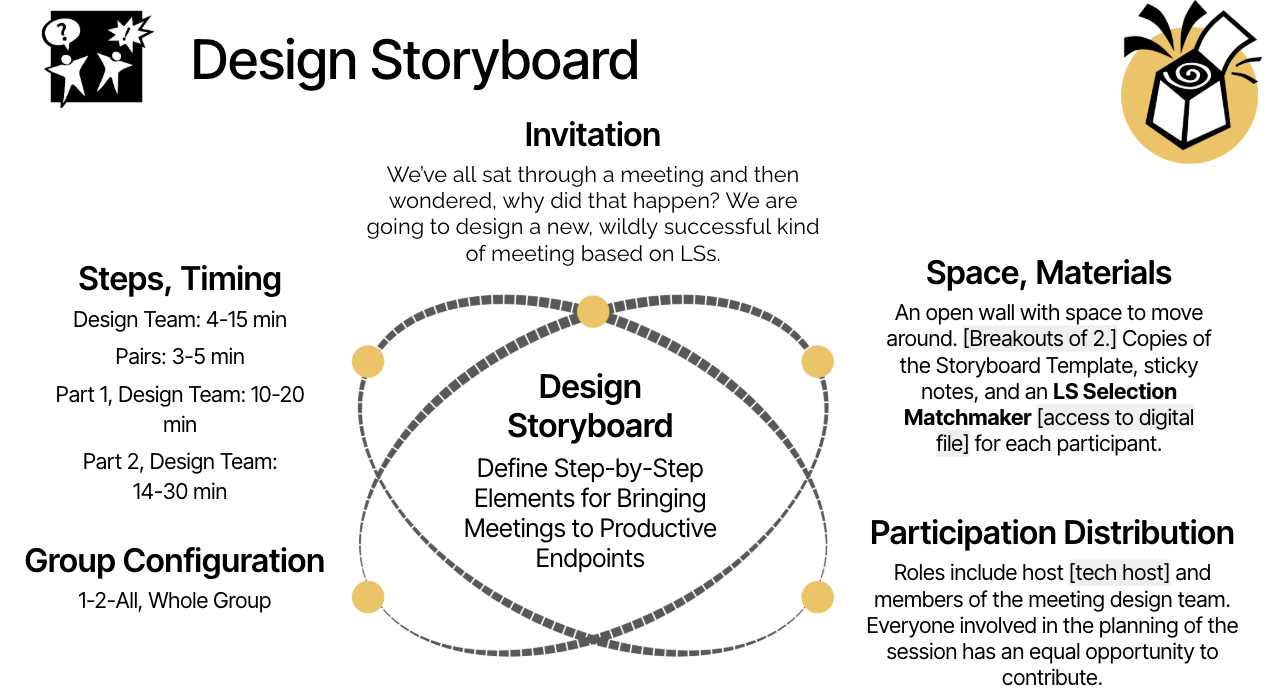
Structuring Invitation
We’ve all sat through a meeting and then wondered, why did that happen? We are going to design a new, wildly successful kind of meeting based on LS.”
Space and Materials
An open wall with space to move around. [Breakouts of two.] Copies of the Storyboard Template (see online resources), sticky notes, and an LS Selection Matchmaker [access to digital file] for each participant.
Participation Distribution
Roles include host [tech host] and members of the meeting design team. Minimum group size is one. Everyone involved in the planning of the meeting or initiative has an equal opportunity to contribute.
Group Configuration
1-2-All
Steps and Time Allocation
Intro: Share the structuring invitation. (1 min.)
Part 1: Design the Storyboard.
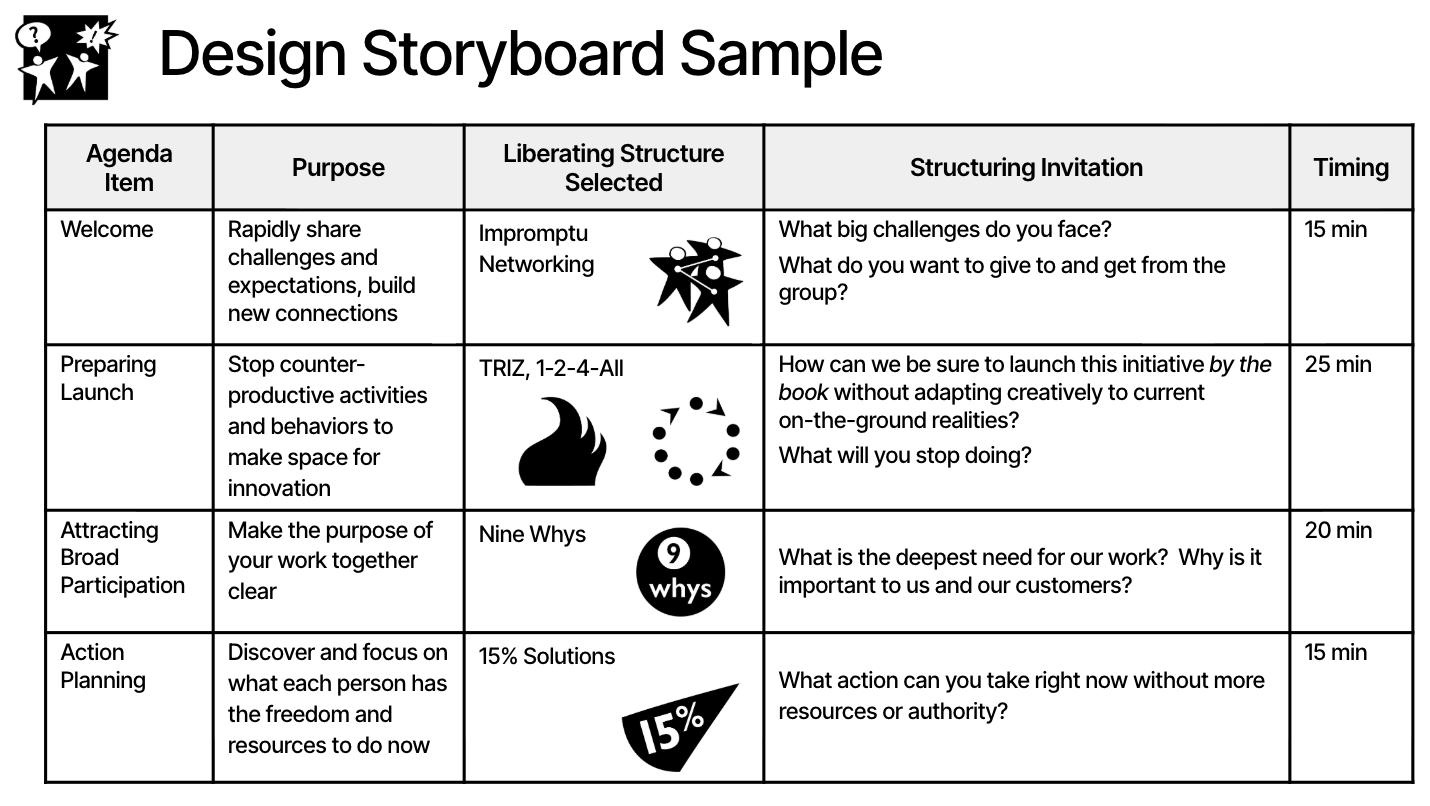
Identify Purpose. Participants use 9 Whys or another LS to identify the purpose of the meeting. (2–10 min.)
Identify Stakeholders. The team drafts a list of people who have a stake in the topic to be addressed—the more diverse, the better. (2–5 min.)
List First Steps. Each participant lists the first steps needed to achieve the meeting purpose and share their list with a partner. (3–5 min.)
Share First Steps. Everyone returns to plenary. A few participants share a first step that stood out in their pairing. Write the first steps where everyone can see them. The team chooses one to use as the first step for the meeting.(3–5 min.)
Choose First LS. Distribute copies of the Matchmaker and blank storyboards. [Participants sketch their own storyboards.] Participants use 1-2-All to choose one LS and a backup to support the first step (see Design Storyboard Example in Collateral Materials for an example). Write the chosen LS on the shared storyboard and invite participants to add it to their own copies. (10 min.)
Complete the Agenda. Participants work together or use 1-2-All to continue choosing an LS for each step of the proposed agenda, being clear on how the steps contribute to the meeting purpose. (5–10 min.)
Part 2: Logistics
Finalize Stakeholders. The team finalizes the invitation list and decides who will host each LS, adding this information to the shared storyboard. Hosts coordinate to plan timing and roles for each LS. (2–10 min.)
Draft Structuring Invitations. The team drafts a structuring invitation for each LS and adds it to the shared storyboard. (5 min.)
Plan Evaluation. Participants determine the questions and process the group will use to evaluate the meeting design (e.g., did the design achieve desired outcomes?). (2–5 min.)
Plan Next Steps. The team schedules next steps, such as follow-up meetings. (5–10 min.)
Taking It Online
Design Storyboards works online with no adjustments.
Practice Insights
Tips
Encourage fast iterations and an attitude of serious play. Use LS Design Cards to aid in stringing structures together. If participants are stuck coming up with the first step, encourage them to break it down into smaller steps until it can be matched with an LS. Don’t skimp on the time needed to create a good design. This will save time in the long term.
Riffs and Variations
Use the same approach to map a current practice based on ethnographic observations. Design larger initiatives or activity series over longer periods of time. Lead a group of individuals in creating their own design storyboards for different meetings with peer support.
Practical Applications
Design Storyboards can help cohosts prepare to colead a meeting. It can be used to review design projects that depend on full team participation. Replace focus groups with Design Storyboards to let users improve a product or service.
Optional String
Debrief the design meeting using What, So What, Now What.
Attribution
Liberating Structure developed by Henri Lipmanowicz, Nancy White, and Keith McCandless.
Collateral Materials
Link to supporting materials for Design Storyboard.
Design Storyboards sample.
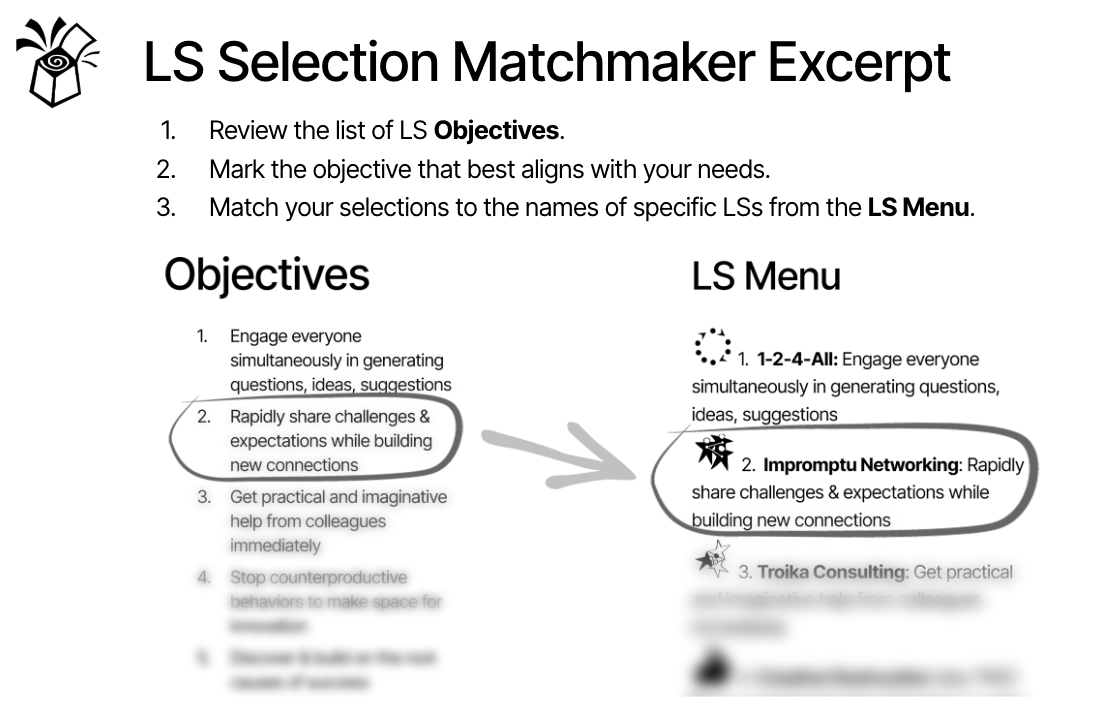
LS Selection Matchmaker excerpt.
Microstructural elements of Design Storyboard in the constellation format.